Even the best frameworks need subtle adjustment from time to time. Because of inconsistencies in impression materials, and dimensional instability of stone models, and now as we’re learning new realities involving CAD/CAM materials, both for printing and milling, it is still a necessity to know how to properly adjust an RPD frame. Today, we’ll specifically speak to adjusting a clasp assembly. That said, there is a method to bending a clasp arm that will lead to more predictable success.
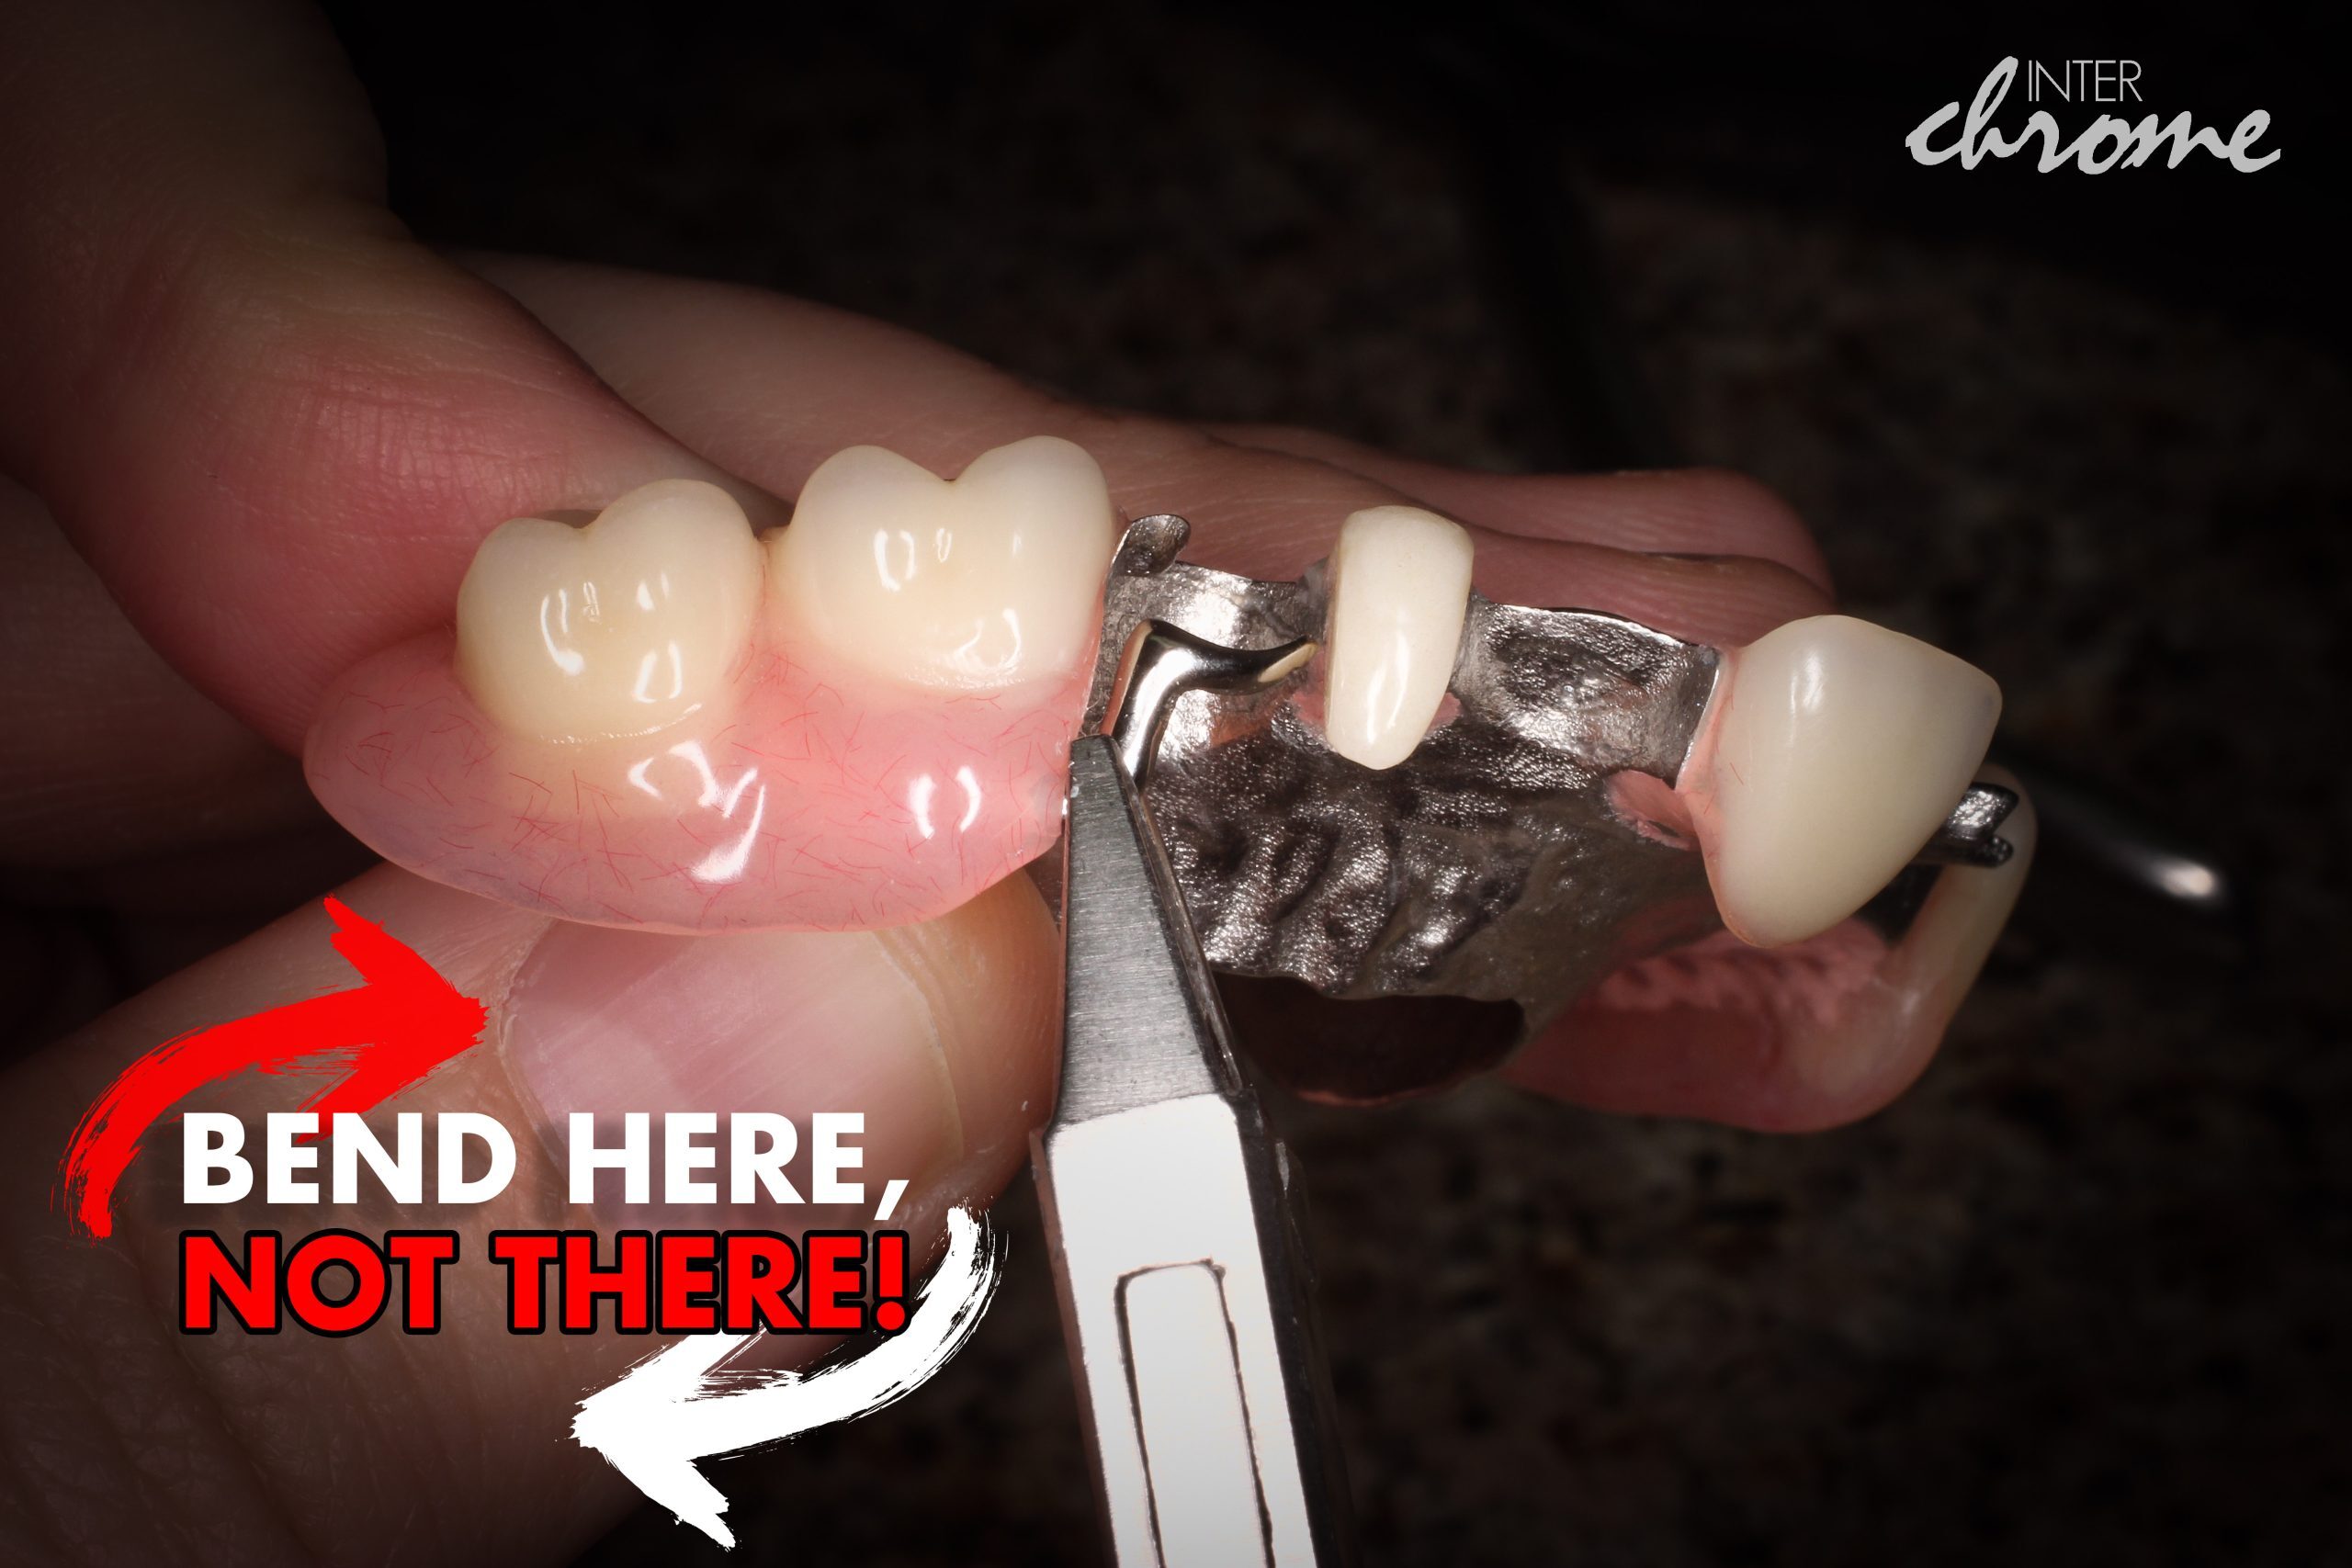
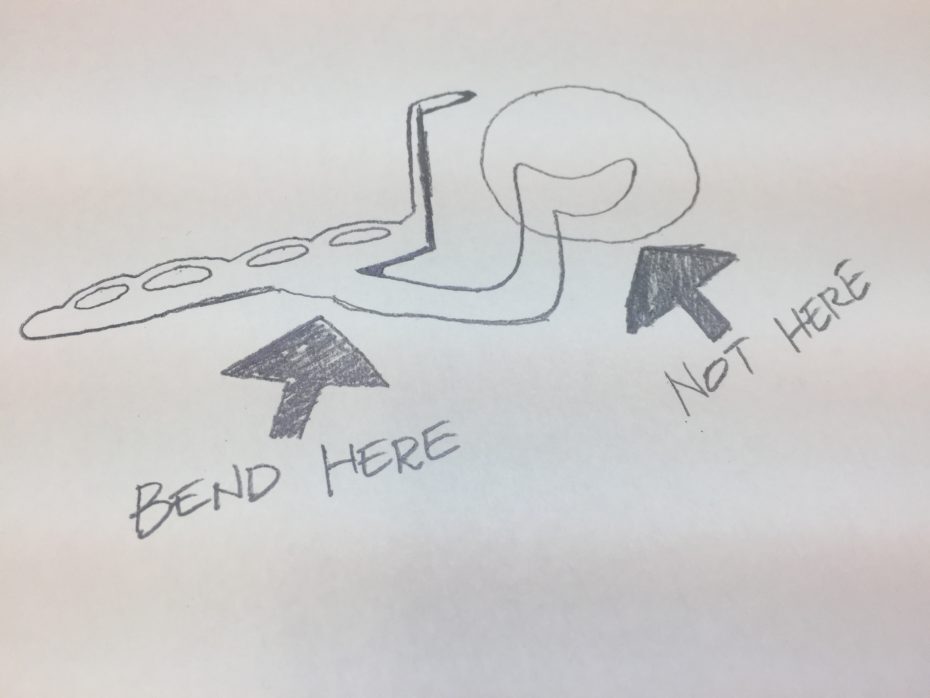
First and foremost, as a clinician trying in a framework, your first goal if adjusting a clasp should obviously be to protect it. Meaning, let’s not break it off before we even get it tried in! You’ll find the best method of adjustment to be adjusting from a position of the greatest strength. The strongest point of a clasp assembly is closest to the thickest metal. Often times adjacent to a saddle. Or extending from the superior portion of a guide plane. This is where one should bend from if adjusting for retention. And as a rule of thumb, a little bit goes a long way. If adjusting from a strong, far back position like this, think of your bend as an arc. If you bend just a little at the fulcrum, out toward the end of the retentive portion of the clasp, you will gain substantially more movement.
We advise you to make these kinds of adjustments prior to having teeth set on your framework as well. The problem with going ahead with an arrangement of teeth on an RPD for tryin prior to trying the frame itself, is that at this point when you need to make a clasp adjustment, wax now covers the strongest, most bulky part of your clasp assembly. You now have two options, both of which aren’t ideal. First, you could remove all teeth from your frame in order to gain access to this location and make a proper bend. But now you’re holding teeth in hand, and doing a proper clinical tryin is now cumbersome. You might even need to do a second tooth try-in appointment. Second, you could go ahead and grab the clasp assembly farther out toward the clasp arm itself, and proceed to bend it from a weaker position. It may work fine. But one wrong tweak of a plier, and you’ll have to remake a framework, or solder to a brand new frame to correct the error.
A little bit of bend goes a long way…
Even more challenging is when you later have a finished partial and you must make a clasp adjustment. Here it is even more imperative to grab the clasp at the position of greatest strength, which is as far back toward the acrylic as possible.
Watch this short video for an example:
Another small but helpful point, is to also note how your bends of clasp assemblies may affect your path of insertion. Clasp support is designed in such a way as to insert over top of undesirable undercuts. When you bend clasp arms, be very careful that you don’t unintentionally bend a clasp right into your own path of insertion. This is common with modified roach clasps, I-bars, and any back-action clasp design. You’ll quickly wonder why your attempt to gain a little more retention is now yielding a framework that won’t seat at all. To avoid ruining a proper path of insertion, also remember that a little bend goes a long way. You may feel as if you don’t even see a bend taking place when putting pressure on a clasp assembly, but go ahead and take it back to the mouth and do a test. It’s always easier to go back and bend some more, than to then try and bend a clasp back out of your path of insertion!
Having these skills in your pocket will help you with your RPD cases. Even more helpful might be to contact us about challenging RPD design elements so that we can help you eliminate potential problems before you experience them while trying in a framework. If we can be of assistance to you in your removable workflow, please give us a call at 757-271-5811 and we’ll help you look like a hero to your patients!
Tags: Adjustments, Clasps, Education, RPD
