
If you’re reading this to find the secret sauce to avoiding a problem then here it is: The digital movement in dentistry isn’t going to solve all of your problems! Surprised? Aren’t we being told that deploying assets right away into an all digital workflow is going to revolutionize how we do things? It doesn’t work quite like that.
Does the transition to digital dentures and partials mean that they will fit better than appliances made in the past?
This depends. In our business, we see digital technology becoming more a part of our everyday workflow throughout our lab. But unlike how it is often presented when companies are trying to sell a new technology, we see new technology more as a new tool as opposed to something groundbreaking. Always remember this fact: there are many ways to do the same thing in dentistry, and when it comes to removables, success still depends on precision record taking, and proper information. Just like when it was all an analog workflow, only now you’re doing it digitally.
This post will concentrate on removable partial dentures and how certain aspects of the digital workflow can affect the end product.
The Scan
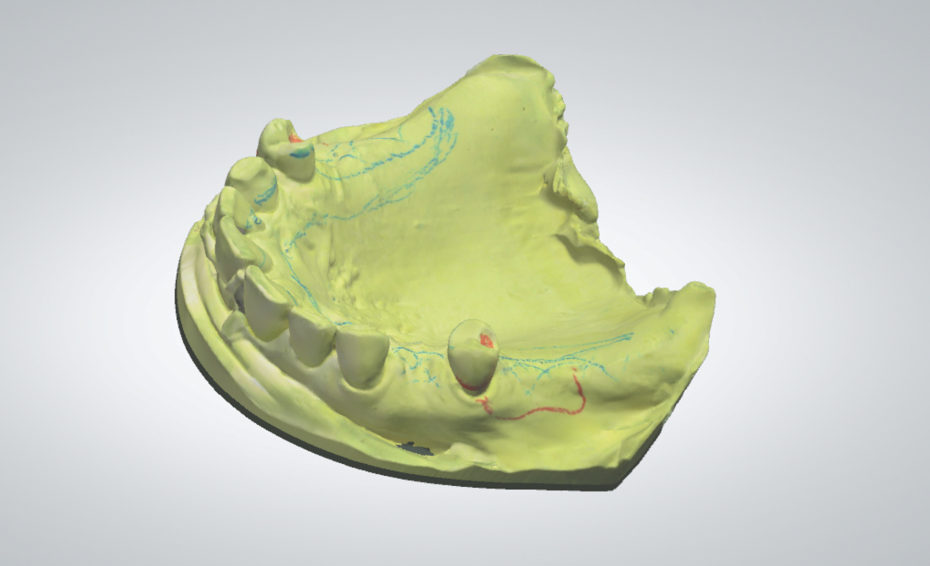
If there’s one aspect that can definitely improve the fit and precision of an RPD frame, it’s the detail of the scan we can acquire. Take for example undercuts. A routine problem with analog impression taking is drag and positives that appear on the master cast. The technician has to remove these spots before fabricating a partial frame, usually by flicking blurbs off with a sharp knife, or with the help of a microscope and a small bur. But even as precise as that can be, the fit is affected because we can never then replicate a model that is pristine and perfect. Scanning helps us out in this regard. We can get true detail in undercuts. We can get true detail in rest preps. In this area, we can fabricate an appliance that is truly precision fitting.
However, other parts of the scan can sometimes be a hindrance to a removable case. We must have all of the information. We must capture the entirety of retromolar pads. We must capture the entire maxillary tuberosity, as well as through the hamular notch. We must have detail that shows the depth of a vestibule, and the lingual floor of the mandible. There is a definite technique that is required to scanning intraorally for this kind of information that varies depending on the scanner being used. Also, patching together an entire maxillary palate digitally can be difficult.
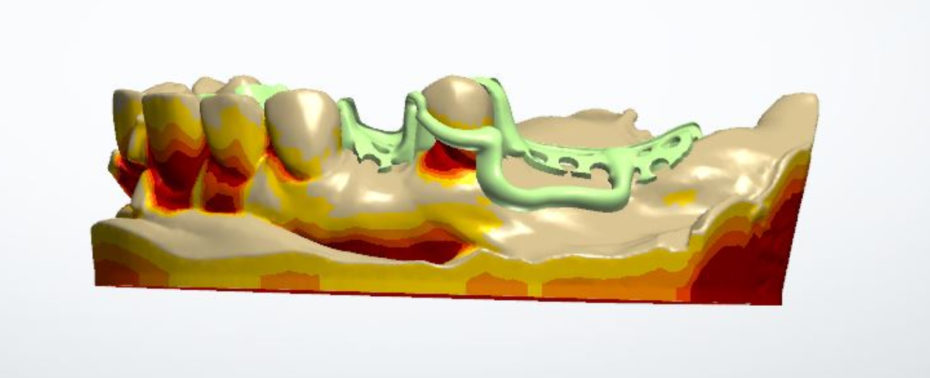
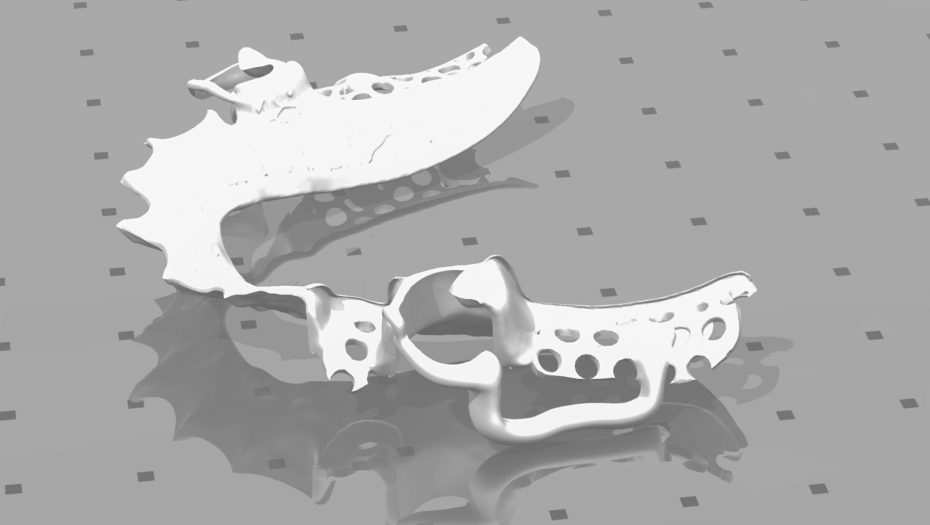
So what can be done about this? The answer lies with strategically piecing together the technology at certain points, such as taking an analog impression, and then scanning it in the lab into a digital file. Even though that sounds like doing double the work, it eliminates a very big potential problem that is equally as important as acquiring detail in the scan, and that is tissue compression. See the following images that show how we begin from an analog master cast, scanning the master cast, creating the CAD design, and the final partial frame.
…and when it comes to removables, success still depends on precision record taking, and proper information.
Tissue Compression
Tissue Compression is a vital component that is easily forgotten as we continue into digital removable appliances. If an appliance is fitting solely over the teeth with no tissue contact, such as a bite guard or a surgical guide, then this isn’t an issue. But the moment the appliance touches tissue, then it is vital to record the natural tissue compression that an analog impression can simulate. If an RPD frame sat only on teeth surfaces, it would fit like a charm. But when tissue compresses, we get dynamic, and more functional detail of edentulous spaces. Bear in mind, even though this advice is today geared toward partials, this is even more true when talking about complete dentures!
When partial frames are fabricated on digital scans, what we see in the mouth is not an outright ill-fitting frame, but one that is not “tissue-tight.” Imagine if you had a case with a palatal strap, if you could get the end of an explorer under the strap portion. Or imagine if a saddle area was not adequately embraced by acrylic due to non-suppression of that tissue. An early reline could be indicated, or an altered cast technique would have to be used. These kinds of occurrences are most exaggerated when you have a Kennedy Class 1 or 2 partial scenario. When abutment teeth are readily available, throughout the arch, these kinds of issues can be less obvious, but to the discerning eye can still be noticed.
In conclusion, avoid these digital dilemmas by incorporating a part analog, part digital workflow to your RPD frames, and the results will be more pleasing. Begin your digital partial workflow with a precise impression that we can then create a digital canvas from which to start. Never assume that information isn’t somehow needed, just because the lab is now doing a process digitally.
If we can help you with your lab work, we’d appreciate the chance to speak with you about your cases. Call us at 757-271-5811. Let’s continue into the exciting new world of digital dentistry together, and with a plan that will get us to the finish line!
Tags: Digital Dentistry, Digital Dentures, Digital Partials, Digital Workflow